

What is a “well-read” person?
It’s usually the one who’s knowledgeable, articulate, thoughtful, and capable of making sound decisions.
We all agree on this.
But there’s a huge misconception about what makes a person well-read.
We tend to think that “well-read” means having read a lot of books.
But this is not necessarily the case.
Imagine two people who read books on personal finance.
One reads only about ten carefully curated books each year, makes time to understand them well, and finally applies them in real life.
Another reads 200 books. That’s roughly four books per week. But they make no time to absorb or apply what they read. They read one, get a thrill from the accomplishment of finishing a book, and jump into another.
Who would make the best financial decisions in real life, given the same circumstances?
It’s quite possibly the one who “reads well,” not the one who “reads a lot.”
These are not the same things.
Realizing this, I too have spent quite some time figuring out how to direct my reading towards becoming that first person.
And here’s how I attempt to do it.
The workflow at a glance
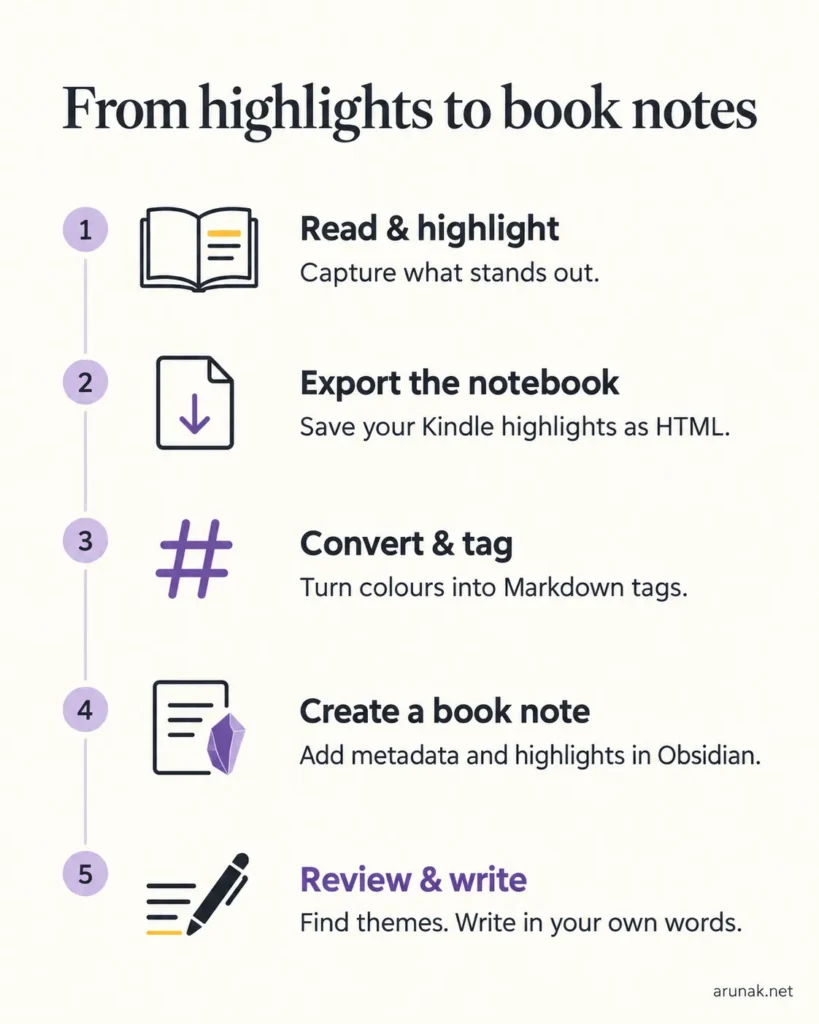
Read, highlight and take notes on the Kindle
The colour system
I realized early on that I needed a highlighting system that was consistent across all the platforms I use. I chose Kindle’s built-in colour highlighting system for this, which turned out to be quite convenient.
I use five highlight colours: yellow, aqua, pink, green, and orange. Colour highlighting is available through the Kindle apps on phones and tablets, as well as on colour Kindle devices such as the Kindle Colorsoft and Kindle Scribe Colorsoft.
These highlights and notes sync across Kindle apps and devices when Sync is enabled, which I always keep turned on.
On a regular monochrome Kindle, such as the Kindle Basic or Paperwhite, though, these colours aren’t available. The highlights appear grey on the device and, when synced and viewed on a colour-capable device like the Kindle app on my phone, they are automatically assigned yellow. I will discuss how I deal with these inconsistencies in a later step of this process.
Here’s how I currently use the five colours:
- 🟨 Yellow →
#idea: the central ideas, arguments, or principles I want to remember. - 🟦 Aqua →
#story: stories, examples, anecdotes, and cases I may want to return to. - 🩷 Pink →
#quote: sentences or passages worth preserving in the author’s own words. - 🟩 Green →
#source: studies, books, papers, statistics, people, or other sources I may want to look up later. - 🟧 Orange →
#thought: my own thoughts, questions, and disagreements.
The colours themselves aren’t particularly important, especially at the later stages of processing them. What’s important is the meaning assigned to each colour: idea, story, quote, source, and thought.
And I don’t always read on the same device. Sometimes it’s a monochrome Kindle, sometimes a colour Kindle, and sometimes the Kindle app on my phone or tablet.
So here’s how I read, highlight, and take notes across each of them.
Kindle Basic
I use the Kindle Basic when I’m not at home since it easily fits into almost any pocket and looks pretty crisp in daylight with a white background.
Since there is only one color available for Kindle Basic for highlighting, I use it for all the types of highlights, and process them separately later in Obsidian.
This is not ideal if I’m reading a long nonfiction book where I have hundreds of highlights. But I rarely read nonfiction on the Kindle Basic. It’s almost always novels.
While reading, I don’t tend to dwell too much on the notes and highlights I’m taking. I can always organize them neatly at a later stage. At this point, my primary focus is on enjoying the book while capturing the things that I find interesting.
Also, a highlight is rarely a note in itself. More often than not, a highlight points to an idea that will develop into a note later in this workflow.
Kindle Colorsoft and the Kindle app on mobile or laptop
This is where I take full advantage of my colour-coding system. I use all five colours whenever I see fit on these devices.
But I always make it a point not to think too much about what type of highlight something is. If it’s not immediately clear to me, I just use yellow and classify it at a later stage.
Export the Kindle highlights into an HTML file
Now that I finished the book with highlights, the next step is to export them.
There are a couple of ways to export Kindle highlights. You can export the notebook from the Kindle desktop or mobile app, retrieve the My Clippings.txt file directly from a Kindle, or use a service such as Readwise to sync them automatically.
Out of these, I find it most convenient to export the highlights from the desktop Kindle app.
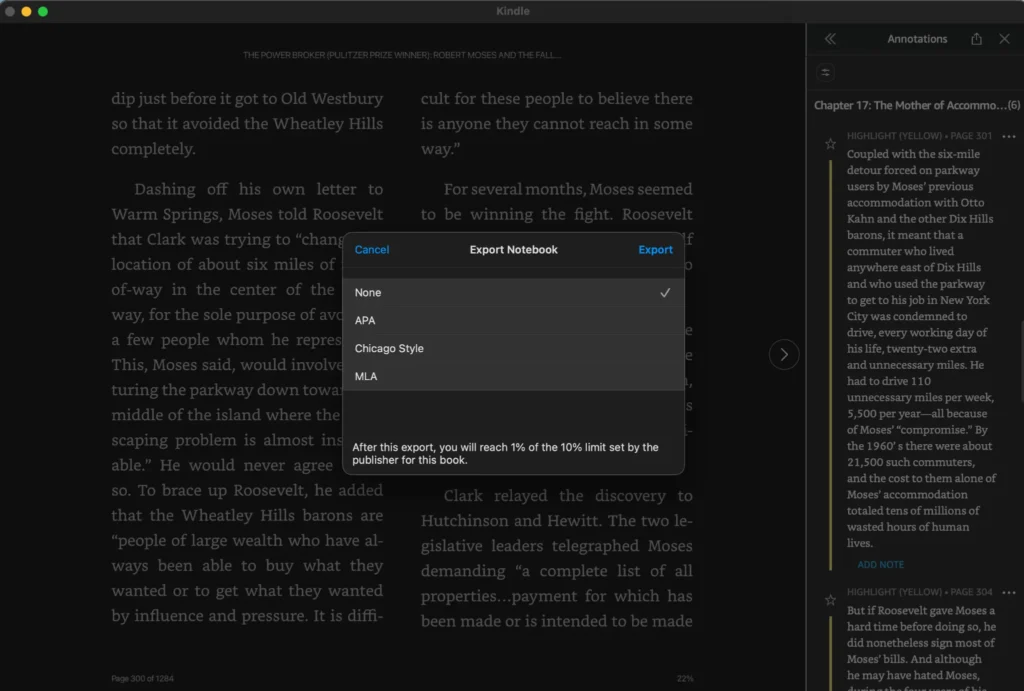
The process is straightforward:
Kindle desktop app → Library → right-click the book → Go to Notebook → Export → Save
The exported notebook is saved as an HTML file. This file contains the highlights and notes from that book.
Convert the highlights into Markdown with meaningful tags
The next step is to transform the colour information into the respective meanings.
The way I handle this is to replace the highlight name with the tag that the colour represents.
For example, anything I highlighted in aqua is a story, example, anecdote, or case I may want to return to later. So instead of keeping aqua in the exported file, I tag that highlight with #story.
The same rule applies to all five colours:
- Yellow →
#idea - Aqua →
#story - Pink →
#quote - Green →
#source - Orange →
#thought
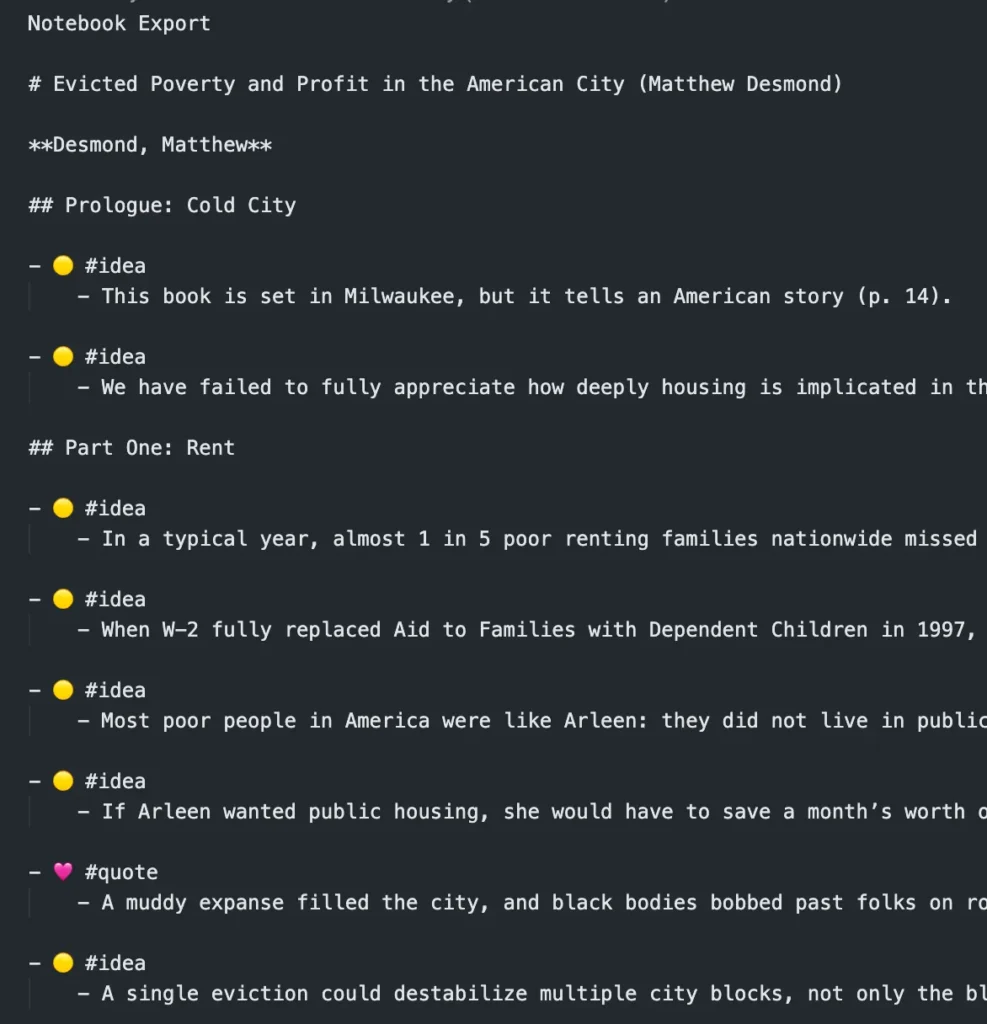
It is also useful to keep everything in an indented bullet structure. The tag becomes the parent bullet, with the individual highlights nested underneath it. This keeps related highlights together while still making each one easy to move, edit, or link later in Obsidian.
To do all this automatically, I use a small Python script. It takes the exported Kindle HTML file, reads each highlight and its colour, converts that colour into the corresponding tag, groups the highlights under those tags, and outputs a clean .txt file that is ready to paste into Obsidian as Markdown.
This script is available on GitHub, along with the instructions for how to use it.
For example, here’s the structure the script creates before I bring everything into Obsidian:
Create the book note in Obsidian
Now that the highlights are ready to be copied into Obsidian, the next step is to create a dedicated note for the book they came from.
There are many ways to do this. Some of the simplest are:
- Create a new note manually: Obsidian → New note → give it the book title → paste in the highlights
- Create a new note using a template: New note → Insert template → choose your book template. More information about Obsidian’s built-in Templates feature can be found here.
- Or, my favourite, create the note directly from Goodreads using Obsidian Web Clipper and a dedicated book template.
Using Obsidian Web Clipper with a dedicated Goodreads template saves me quite a bit of time. Instead of creating the note and filling in all the book information myself, the template pulls the relevant information from the Goodreads page and creates the note for me.
My workflow is:
Open the book on Goodreads → Open Obsidian Web Clipper (Hotkey: cmd + O) → Web Clipper automatically triggers the correct template → Click “Add to Obsidian”
This creates a new book note in my vault with the title, author, cover, publication information, and the other properties I want already filled in, in the folder that I previously set up. I then paste the processed Kindle highlights into the same note.
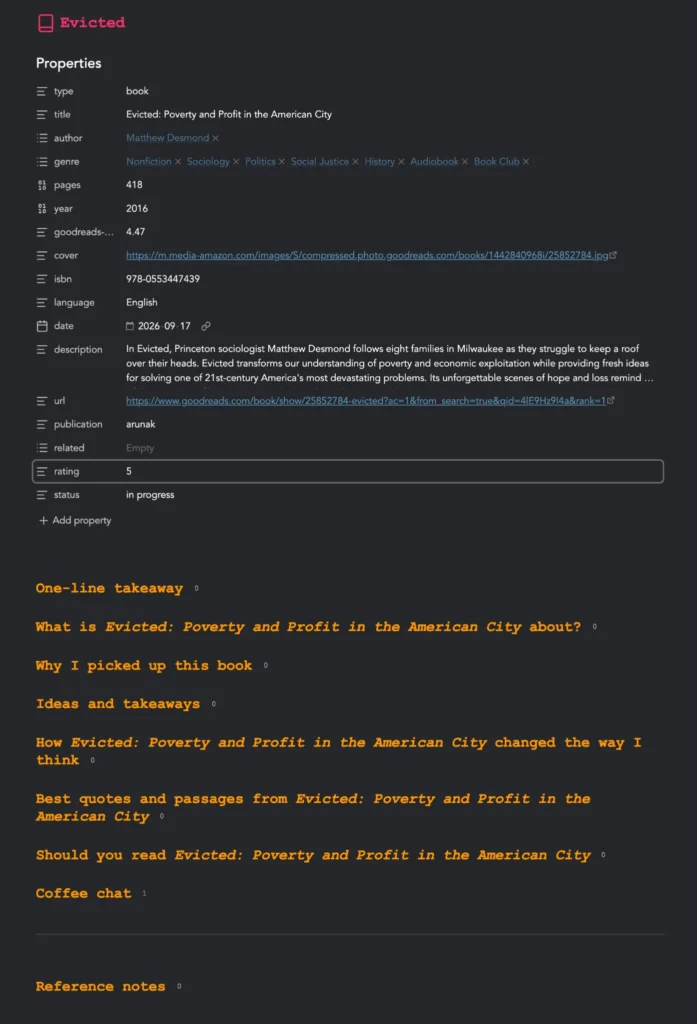
My Goodreads Web Clipper template can be downloaded from GitHub, along with instructions for importing and using it.
Go through the highlights and write a short review
Once I have all the highlights properly sorted, tagged, and colour-coded in a dedicated note for the book, I carefully go through each and every highlight again.
This is also the stage where I reassign the tags when needed.
Sometimes, for example, I’d highlight a sentence or paragraph in yellow, which means #idea in my system. But on this second read, I might realize that it’s actually a story, or a piece of evidence.
This means it belongs under the tag: #story.
As I’m reading, I also remove or combine highlights until I start to see patterns in my own attention.
Through this process, I get to see what interested me most in that particular book, which parts I didn’t understand well, and which resources I need to check out later.
If I used the Kindle Basic, where all the highlights begin as yellow, this is also the stage where I manually assign the different tags.
This process takes quite a bit of time. But that’s intentional.
Through this slow process, I continuously go back and forth between my note in Obsidian and the book, trying to make connections, build themes, and figure out what the book is about as a whole.
I also find that the overall concept of the book that I’m able to grasp at this stage can completely change the way I thought about a particular idea while I was reading it.
Something I found interesting on page 40, for example, can take on a completely different meaning or interpretation by the time I reach the end of the book.
This is one of the biggest advantages of this process. Instead of ending up with a bunch of isolated ideas, I get to understand the whole picture through this exercise.
Compress the highlights into a few ideas
Once I have the confidence that I have a fairly good grasp of the book, I start grouping the note into themes.
Then I write a short summary and review around those themes, using the highlights as the foundation.
This process usually looks something like this:
62 highlights → 11 clusters → 6 ideas
To test how well I understood the book, I write the review in two steps.
Write from memory first
First, I write the second section shown in the template: “What is this book about?”
I do this without looking at my theme clusters or highlights, so that I can see whether I have a good understanding of the overall concept of the book.
In this short section, I usually cover things like:
- What is the central argument?
- What are the key points?
- What did I agree with?
- What did I disagree with?
- Were there any particular examples or stories that stood out?
After writing this section, I move on to the review itself, based on the themes and ideas I worked out in the previous steps.
## One-line takeaway

## What is this book about?

## Key ideas

### Idea 1

### Idea 2

### Idea 3

## What I think
Once the first draft is complete comes the hardest sentence to write, but also the most important.
It’s the first section of the note: “One-line takeaway.”
I sometimes take hours, even days, to write this one sentence. I also keep coming back to edit the “What is this book about?” section. Both force me to think more carefully about what the book is really about, and how those ideas might apply to day-to-day life.
Optional: publish the note
Publishing these notes online gives me a sense of accountability.
It pushes me to not only research well, but also write well. And in the process, I tend to get more out of the book than I would if the review stayed inside my Obsidian vault.
Some of the places where you can publish these kinds of notes, and perhaps help someone else along the way, are:
- Goodreads
- StoryGraph
- Your own website
Conclusion: this system is deliberately inefficient
This workflow could be made much faster, especially with the AI tools available today.
For example, I could have an AI agent export the highlights and create the necessary topic clusters in Obsidian.
But I deliberately keep this process manual.
Because with a heavily automated workflow, no matter how efficient it is, I’d lose the very thing I wanted to achieve through this workflow in the first place: to learn something from it.
The goal here is to hang around with the highlights and notes until they start to make sense, not just to write a review.
In other words, the value is in the process, not necessarily the outcome.
This intentional inefficiency is a necessary evil.
